

Miro – Excellent Online Collaborative Whiteboard
With a majority of people operating through online workspaces, there is a high rise in the demand for the ability to work cooperatively with others. For this, online whiteboards not only provide seamless ways to communicate, but also fulfill the need for collaboration. Digital whiteboards become the need of the hour for visual collaboration and virtual workshops whenever geographically distributed teams need to work on common projects.

If you too are exploring a solution that will facilitate collaboration and brainstorming, Miro is one of the best choices. Miro has distinguished features and it offers different memberships liberties that make it an excellent online whiteboard for project managers, consultants, individual contributors, and developers. In this article, we will discuss how Miro is different from other digital whiteboards, and also learn how to use this software.
What is Miro?
Miro is an online collaboration tool which helps in strategizing, sharing ideas, managing projects, and much more. It was launched in 2011 to provide a flexible digital wireframing platform for distributed teams.
The software’s whiteboard can be used to create models and structure for projects, to jot down ideas, and even to give feedback on other team members’ work. There are preloaded templates to create boards, and one can also convert these boards into PDF or presentations.
Miro is available on desktop, mobile, and tablets and can also be accessed directly from the website. It is loaded with numerous features that facilitate users to organize ideas and people altogether, better than any other platform. Some of the key features of this tool are:
Infinite Canvas
The whiteboard canvas of Miro has an infinite zoom that allows users to work according to their way. You can plan your project from any angle while supporting simultaneous editing of up to 200 members.
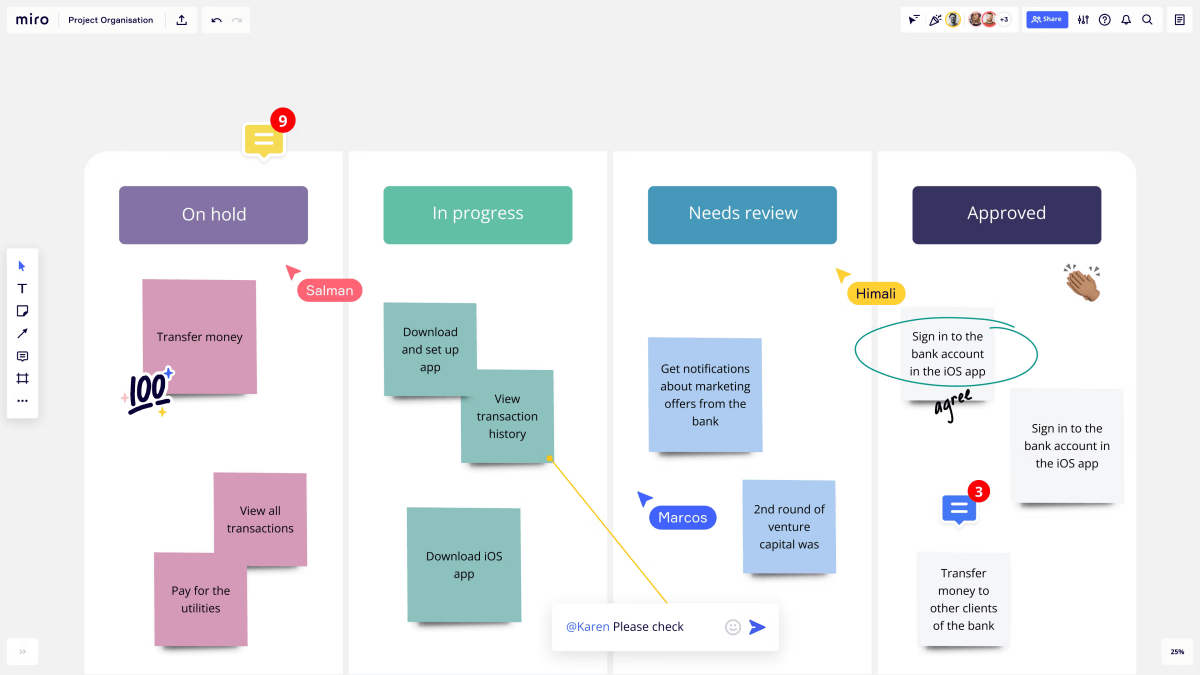
Stickies and Cards
In Miro, sticky notes of 2 shapes, 3 sizes, and different colors are available. They can be used with links, tags, and emojis for quickly noting down your ideas on the canvas. Cards are enhanced forms of sticky notes with the assignee, description, and date.
Templates
Miro has over 200 interactive templates on board. It also allows users to share their custom templates, which bring more value as we can easily and quickly show ideas we are experimenting with.
Text and Video chat
Even though they aren’t comparable with Zoom and Microsoft Teams, the text and video chat features of Miro work very well. They’re quite simple and easy to use, and you don’t even have to arrange a multi-screen setup in it.
Voting
The voting plugins of Miro allow us to create a time-boxed voting session to vote on shapes, cards, and images by other members. We can decide the number of votes per person also.
Commenting
We can easily create a feedback session for members to show their thoughts on each other’s ideas by using the comment feature.
With these selected features, Miro provides several other features to make project brainstorming and walkthroughs more understandable and fun.
How to use Miro?
1. Sign up
Follow the below-mentioned steps to create a Miro account:
- Go to Miro’s website and click on the “Sign up for Free” option in the top right corner.
- You will be directed to a new page to enter all the information required.
- After entering all the details, fill in a code sent to your email address.
- Now you can select your preferences to set up the software according to your work type.
- After completing your setup, you can invite others to start collaboration.
- You can select from different areas of focus such as mapping and diagramming, research and design, meeting and workshops, etc., or simply skip this step to start from a blank.
2. Board Creation
Initially, most users select a blank canvas to start with. Once a board is selected, you can add different features to it according to your needs.
Here are the steps to create a board:
- After logging into Miro, click on the option of New Board.
- A pop will appear where you can select “Create a Shared Board” as a free user and upgrade to get a membership to create a Private Board.
- Now you can select from the pre-loaded templates or close the window to get a blank board.
- From the available options, you can change the frame type or size and can also export a frame. A frame helps you in structuring and managing content in separate areas on the canvas.
- After selecting a frame, you can add sticky notes, images, videos, texts, and mind maps to your board. To view different frames together on the board, you can zoom out.
3. Creation of Mind Map
A Mind Map is used for structuring and brainstorming your ideas, schemes and thought processes. The steps to create a Mind Map in Miro are as follows:
- On the canvas, click on the horizontal ellipses at the bottom left of the screen.
- You can then select the “Mind Map” option from the list and place it anywhere on the board.
- For creating child nodes for the mind map, click on the + icon.
- You can now add links, images, texts, and videos.
4. Designing Your Research
Research is the most vital part for any task. You can save video URLs, website links, and images in files on your hard drive, but it’s not that simple to understand. Here Miro can help by allowing you to create a design of thought process on the board.
Here are the things you can do to organize your research in Miro:
- Lay down content sections logically and preview it by traveling through its different parts.
- Add videos and images and also add sticky notes as reminders. You can also leave comments for other members.
- Extend any multi-page document by clicking on the Extract Pages option.
These are some basic things that you can perform in Miro. There are several other features that you can use for more detailed work such as reviewing, collaborating, connecting other apps, etc.
Evaluating Miro
Now it’s the time to answer the most vital question – how good is Miro for your purpose? Let’s look at the tool’s pros and cons to find that out.
Pros
- Saves all the files automatically
- Has the option of saving Boards as PDFs.
- Variety of tools for the ideation of projects.
- Integration with many other software tools.
- Expandable board and cursor tracking of others.
Cons
- Zoom-in features can be more accurate.
- Controls and combinations of keys can sometimes be confusing.
- Some functions are missing in the Web version.
- Sometimes problems occur while connecting to Office 365.
- Lagged processing if whiteboards get overloaded with information.
Collaboration made easy with @mirohq miro.com/ via @supermonitoring
Final Verdict
Miro is quite an innovative tool that brings efficiency and fun to online meetings and project discussions. Whether you’re using it for presenting your ideas to the team or for mapping strategy or brainstorming, Miro makes the online discussion sessions more meaningful than any other traditional way.


